What is a CDN and Why Your Website Needs One
In today’s digital world, users expect websites and apps to load in the blink of an eye. Whether you’re running a personal blog or managing a large-scale e-commerce platform, delivering content quickly and reliably is critical to user experience and SEO performance. This is where a CDN — or Content Delivery Network — comes into play.
A Content Delivery Network (CDN) is a geographically distributed network of servers designed to deliver web content — such as HTML pages, JavaScript files, stylesheets, images, and videos — to users with high availability and performance.
Instead of relying on a single server (which could be halfway around the world from some of your users), a CDN stores cached versions of your content on edge servers located in multiple data centers across the globe.
When a user accesses your site, the CDN intelligently routes their request to the server closest to them geographically, ensuring faster load times and a smoother experience.
Understanding CDN with a YoYo Business Example
Let’s say you’ve started a small business making high-tech yoyos at your home in Sydney, Australia. At first, you ship them locally, and everything works smoothly. But soon, you notice a growing demand from customers in North America.
Now, shipping each yoyo from Sydney to North America takes time and costs more. To speed things up and improve customer satisfaction, you decide to send a big batch of yoyos to your friend who lives in the U.S. So whenever someone from North America places an order, your friend can ship it directly — it’s faster and cheaper.
That’s exactly how a CDN (Content Delivery Network) works.
Instead of sending every request to the original server (your home in Sydney), the CDN stores your static content (like images, videos, and files) on servers located closer to your users (like your friend’s house in North America). When a user visits your website, the CDN serves the content from the nearest location, making the site load much faster.
The content stays cached there until it either expires based on a set time (TTL — Time to Live) or is manually cleared by you.
Popular CDN providers
There are many CDN services available, ranging from free to enterprise-grade solutions. Some of the most popular ones include:
- Cloudflare – Popular for both security and performance, with a generous free plan.
- Amazon CloudFront – AWS’s CDN, great for deep cloud integrations.
- Akamai – One of the oldest and most extensive CDN providers.
- Google Cloud CDN – Integrated with Google Cloud services.
- Fastly – Known for real-time caching and developer-friendly tools.
Step-by-Step Guide: Integrating CloudFront with an AWS Load Balancer
Prerequisite
You should have a setup where a server runs a web server (such as Nginx or Apache) to serve files or images, and it’s placed behind a load balancer.You can also refer to the link [here] .
Make sure to add a cache control header in the config, like:
add_header Cache-Control "public, max-age=86400";
My Nginx server block looks like:
    server {
        listen       80;
        listen       [::]:80;
        server_name  _;
        root         /usr/share/nginx/html;

        # Load configuration files for the default server block.
        include /etc/nginx/default.d/*.conf;


        location / {
        root /usr/share/nginx/html;
        add_header Cache-Control "public, max-age=86400";
        }
    }
By adding this header, the web server instructs CloudFront and browsers to cache the content for 1 day (86400 seconds).
Why Cache-Control Matters
By default, CloudFront is conservative about caching. Here’s why:
- Without an explicit Cache-Control, CloudFront doesn’t know:
- How long it should store the content (max-age)
- If it’s safe to cache the response (public vs private)
- Whether it’s allowed to serve stale content
- Use its default TTL, if you’ve set one in the cache policy
- Otherwise, may decide not to cache (especially for HTML)
When Cloudfront Caches by Default
| Scenario | Cached by Default? | Notes |
| Response has Cache-Control: public, max-age=86400 | Yes | Fully cacheable |
| Response has Cache-Control: no-cache or private | No | Explicitly tells CloudFront not to cache |
| Response has no cache headers | Maybe | Depends on the CloudFront cache policy TTLs |
Steps to Setup Cloudfront Distribution
- In the AWS Console, search for CloudFront, then click on Create a CloudFront distribution.
- Provide a name. For simplicity, choose “Single website or app” under the distribution option, then click Next.
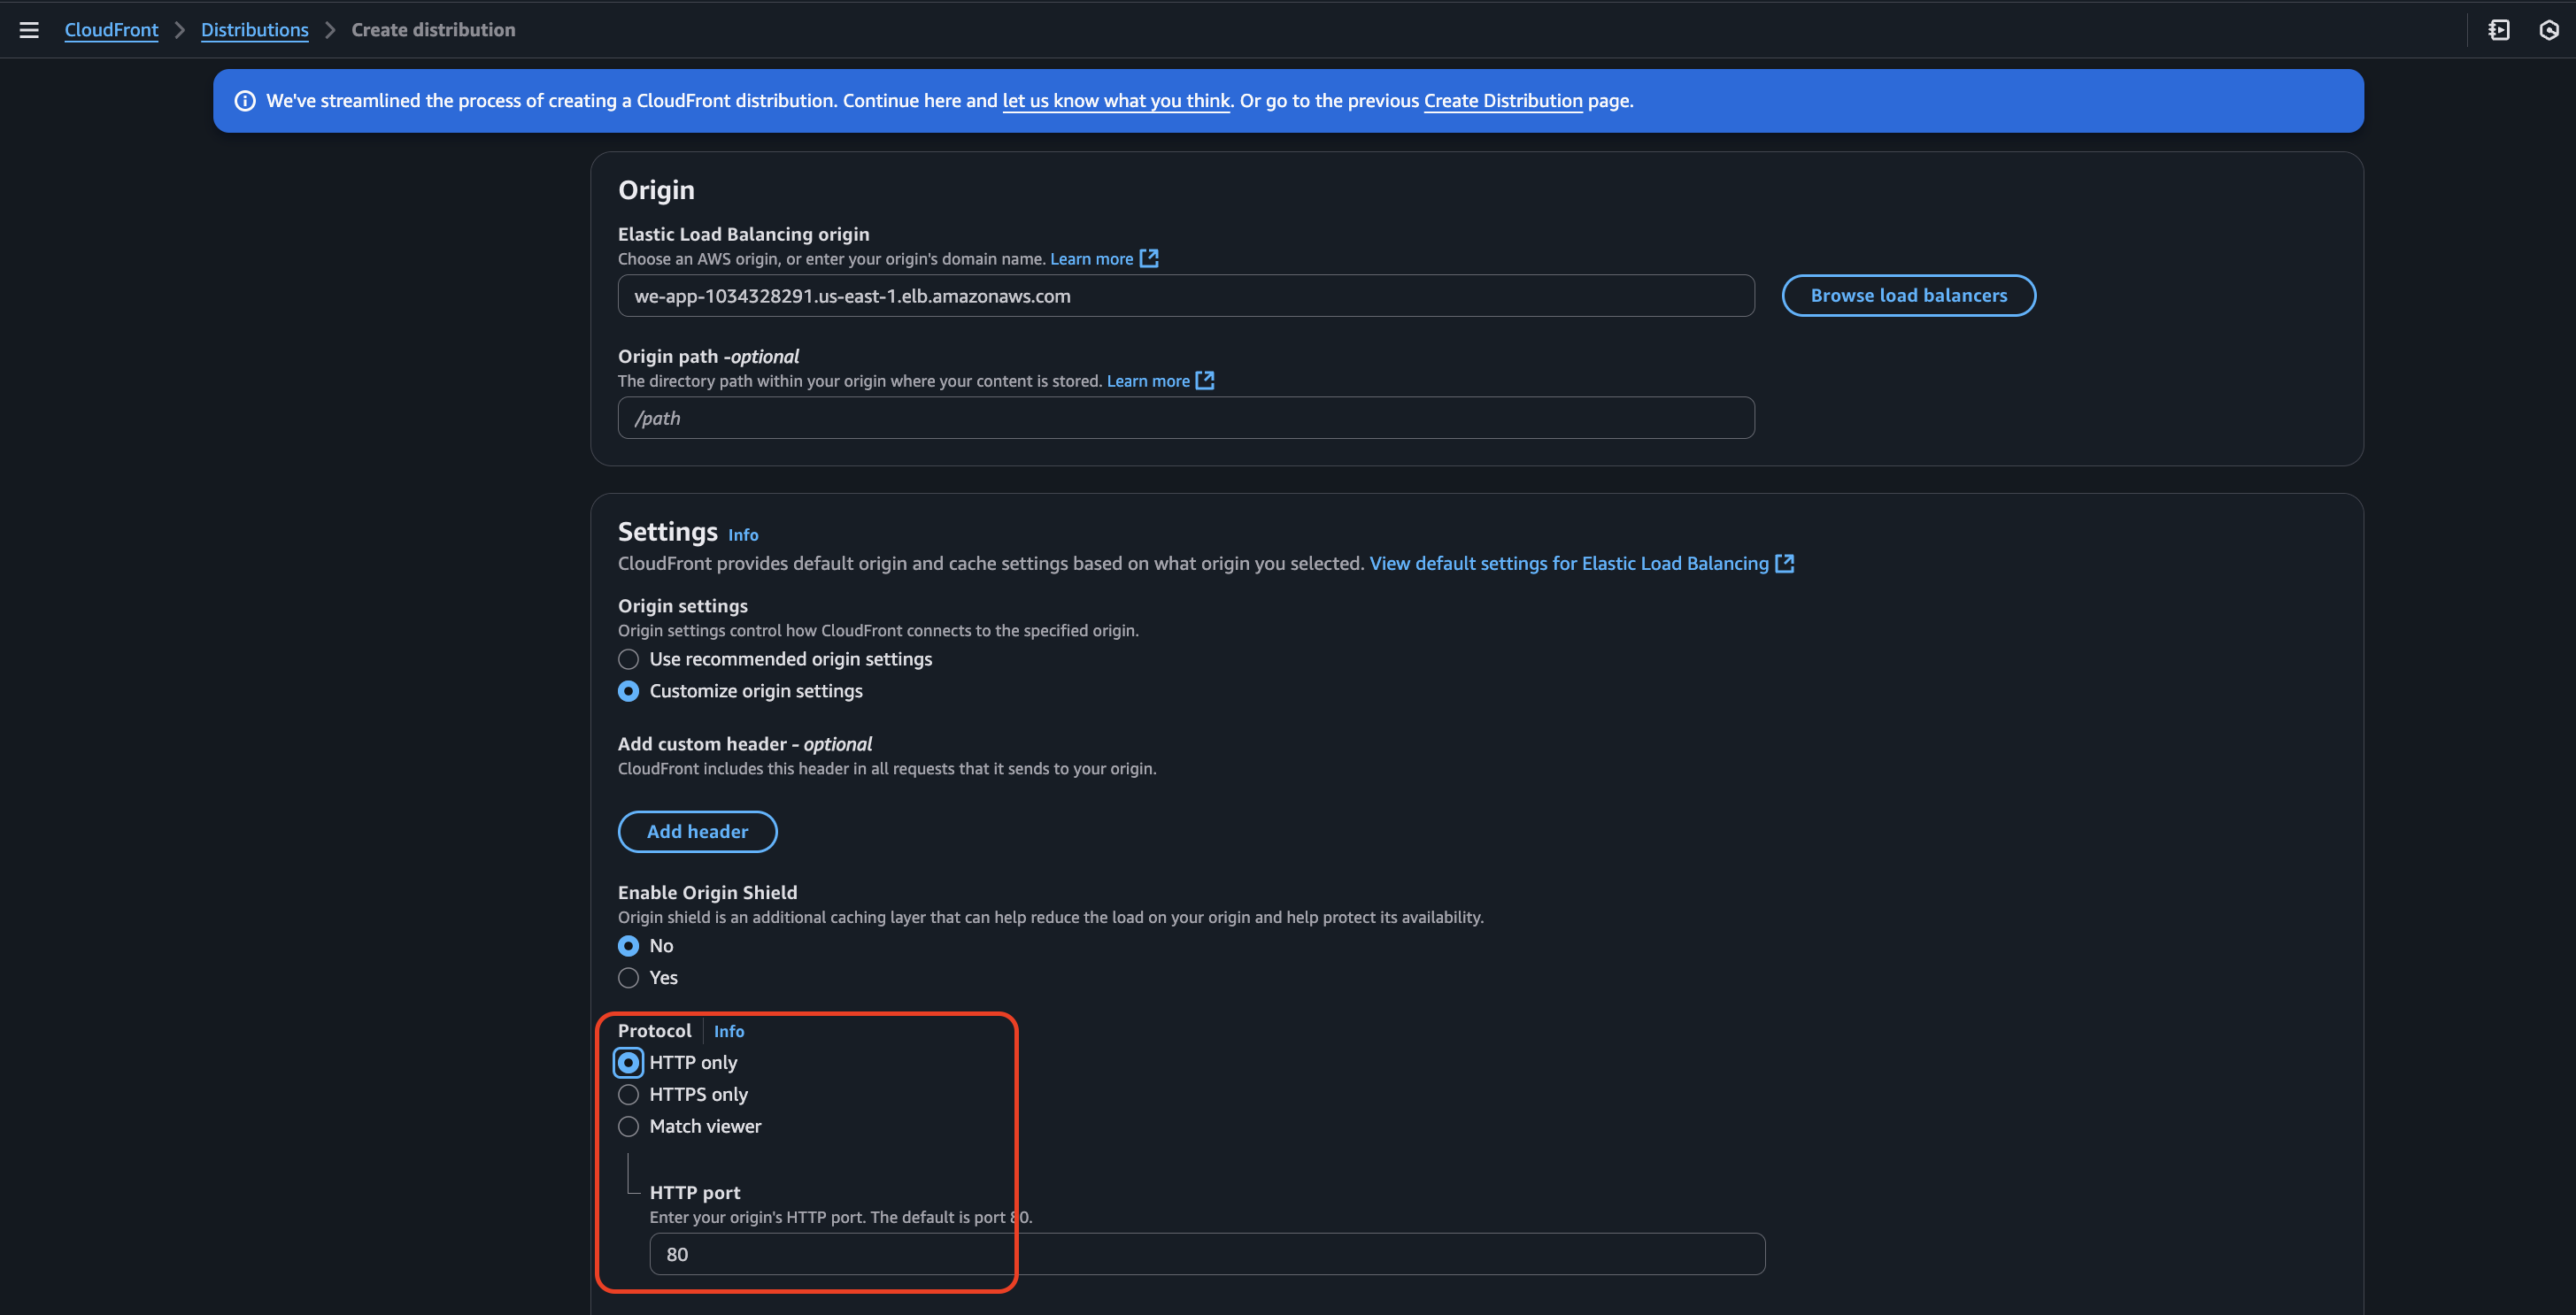
- Here, CloudFront offers different origin sources — we’ll use Elastic Load Balancer.
- Under Origin, browse existing load balancers, select yours, and click Next.
- Select Custom origin settings, and choose HTTP only under the protocol (since our target listens on port 80). and click on next You can learn more about origin settings [here] .
- On the next page, you’ll see security settings where you can enable WAF within CloudFront.
Learn more about CloudFront and WAF
[here]
.
For now, select “Do not enable security protection” and click Next.
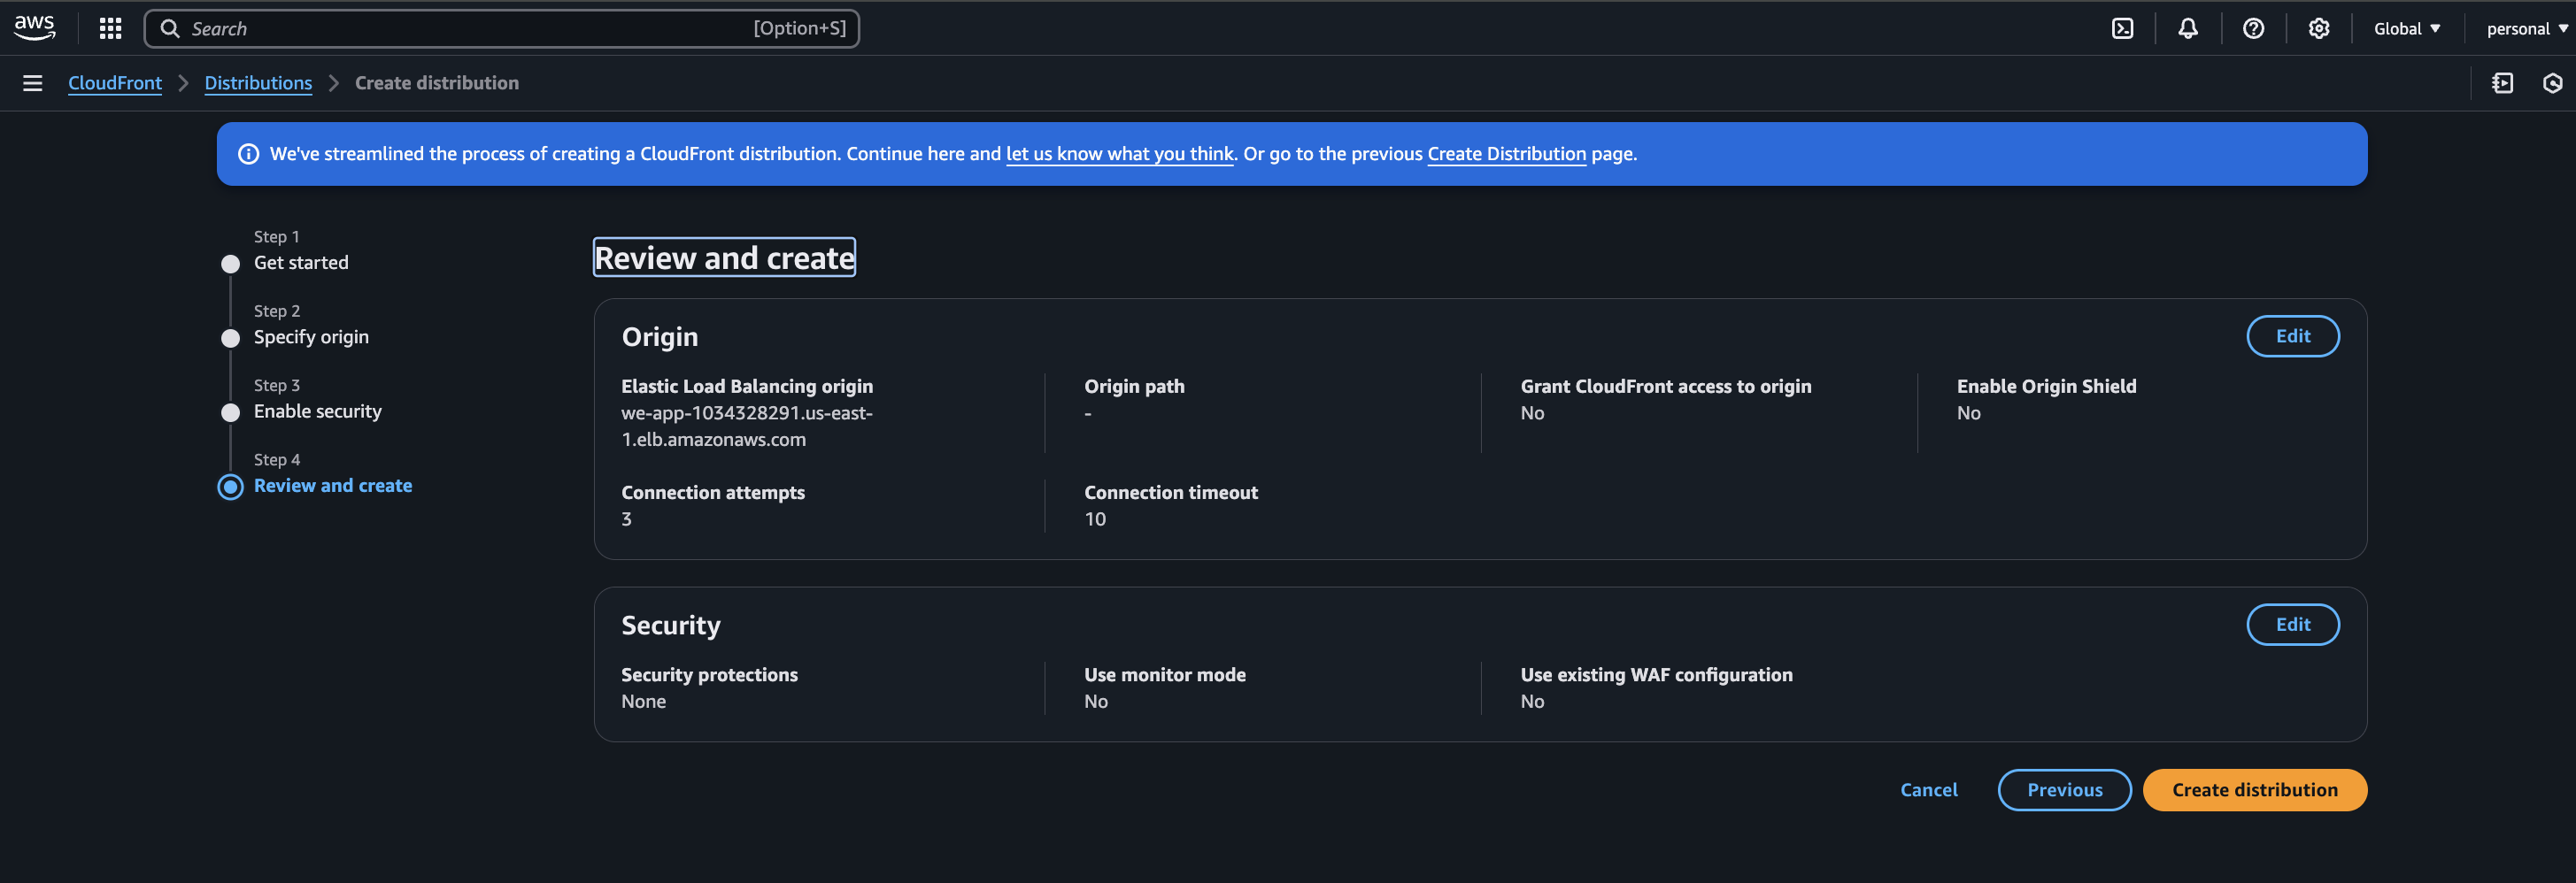
Once created, you’ll see the Last modified state. If it's deploying, wait for a few minutes.
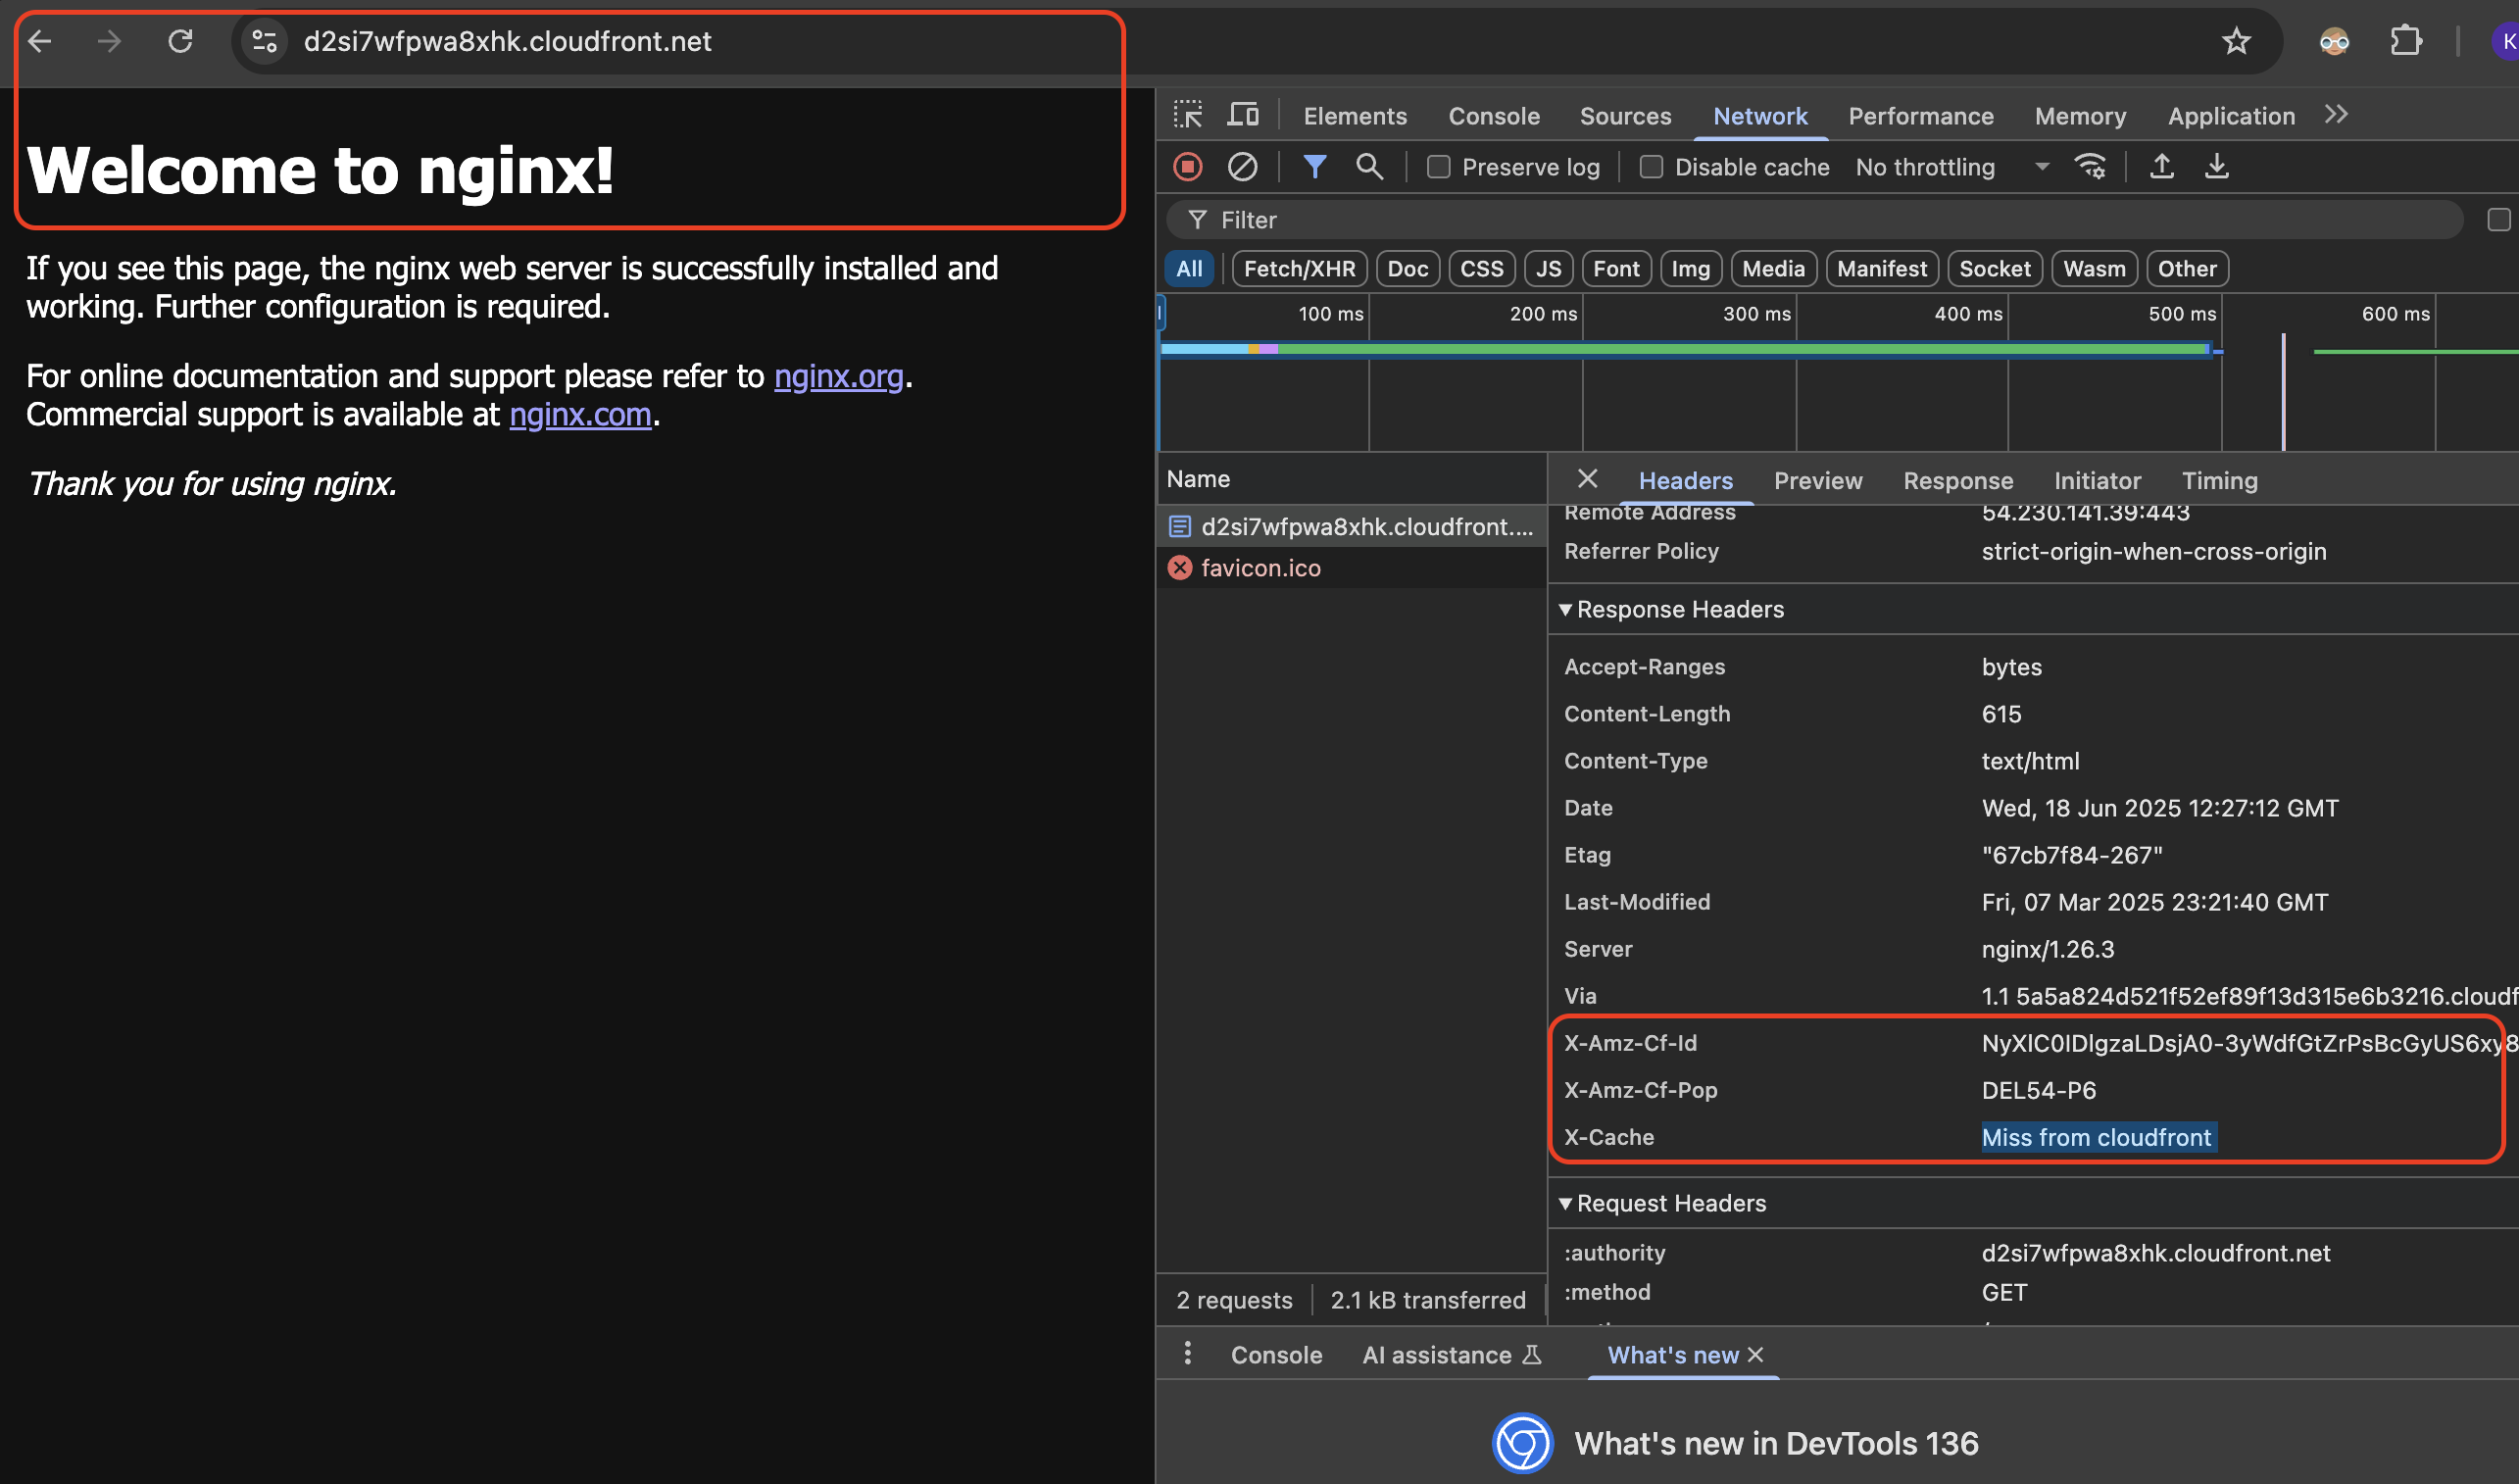
You can now access the web server using the distribution domain name.
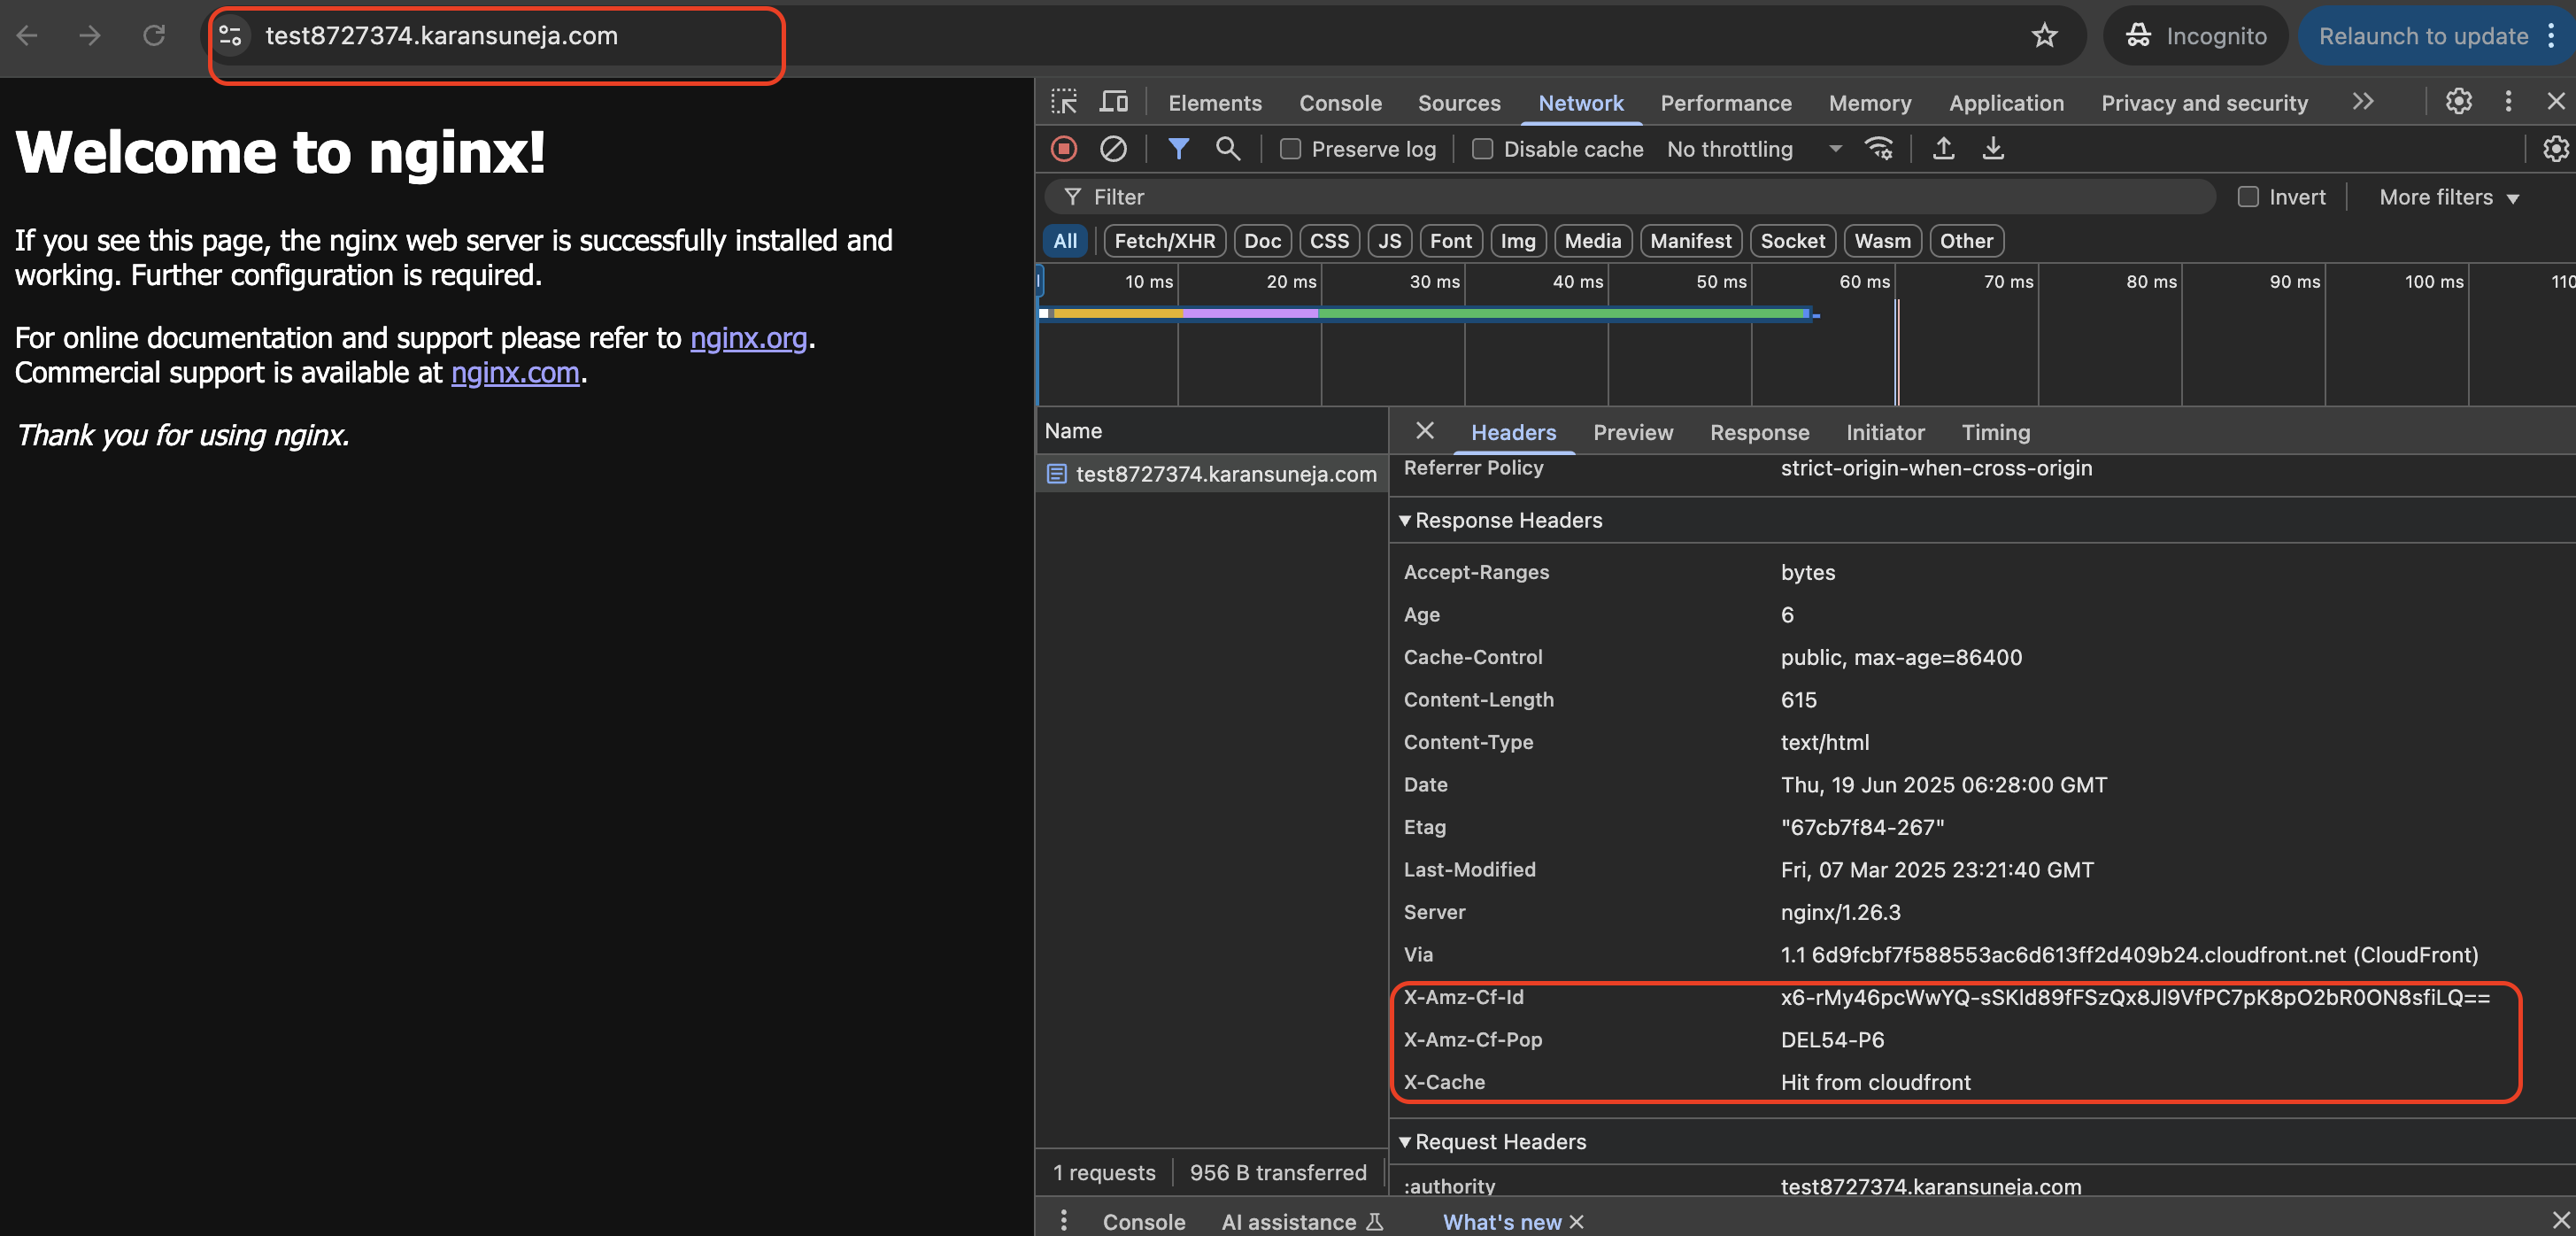
Check the response headers — CloudFront adds extra headers that indicate cache behavior.
One important header is x-cache, which shows whether the content is served from an edge location or the origin server.
For the first request, you'll see:
Miss from CloudFront – meaning the response is coming from the origin.
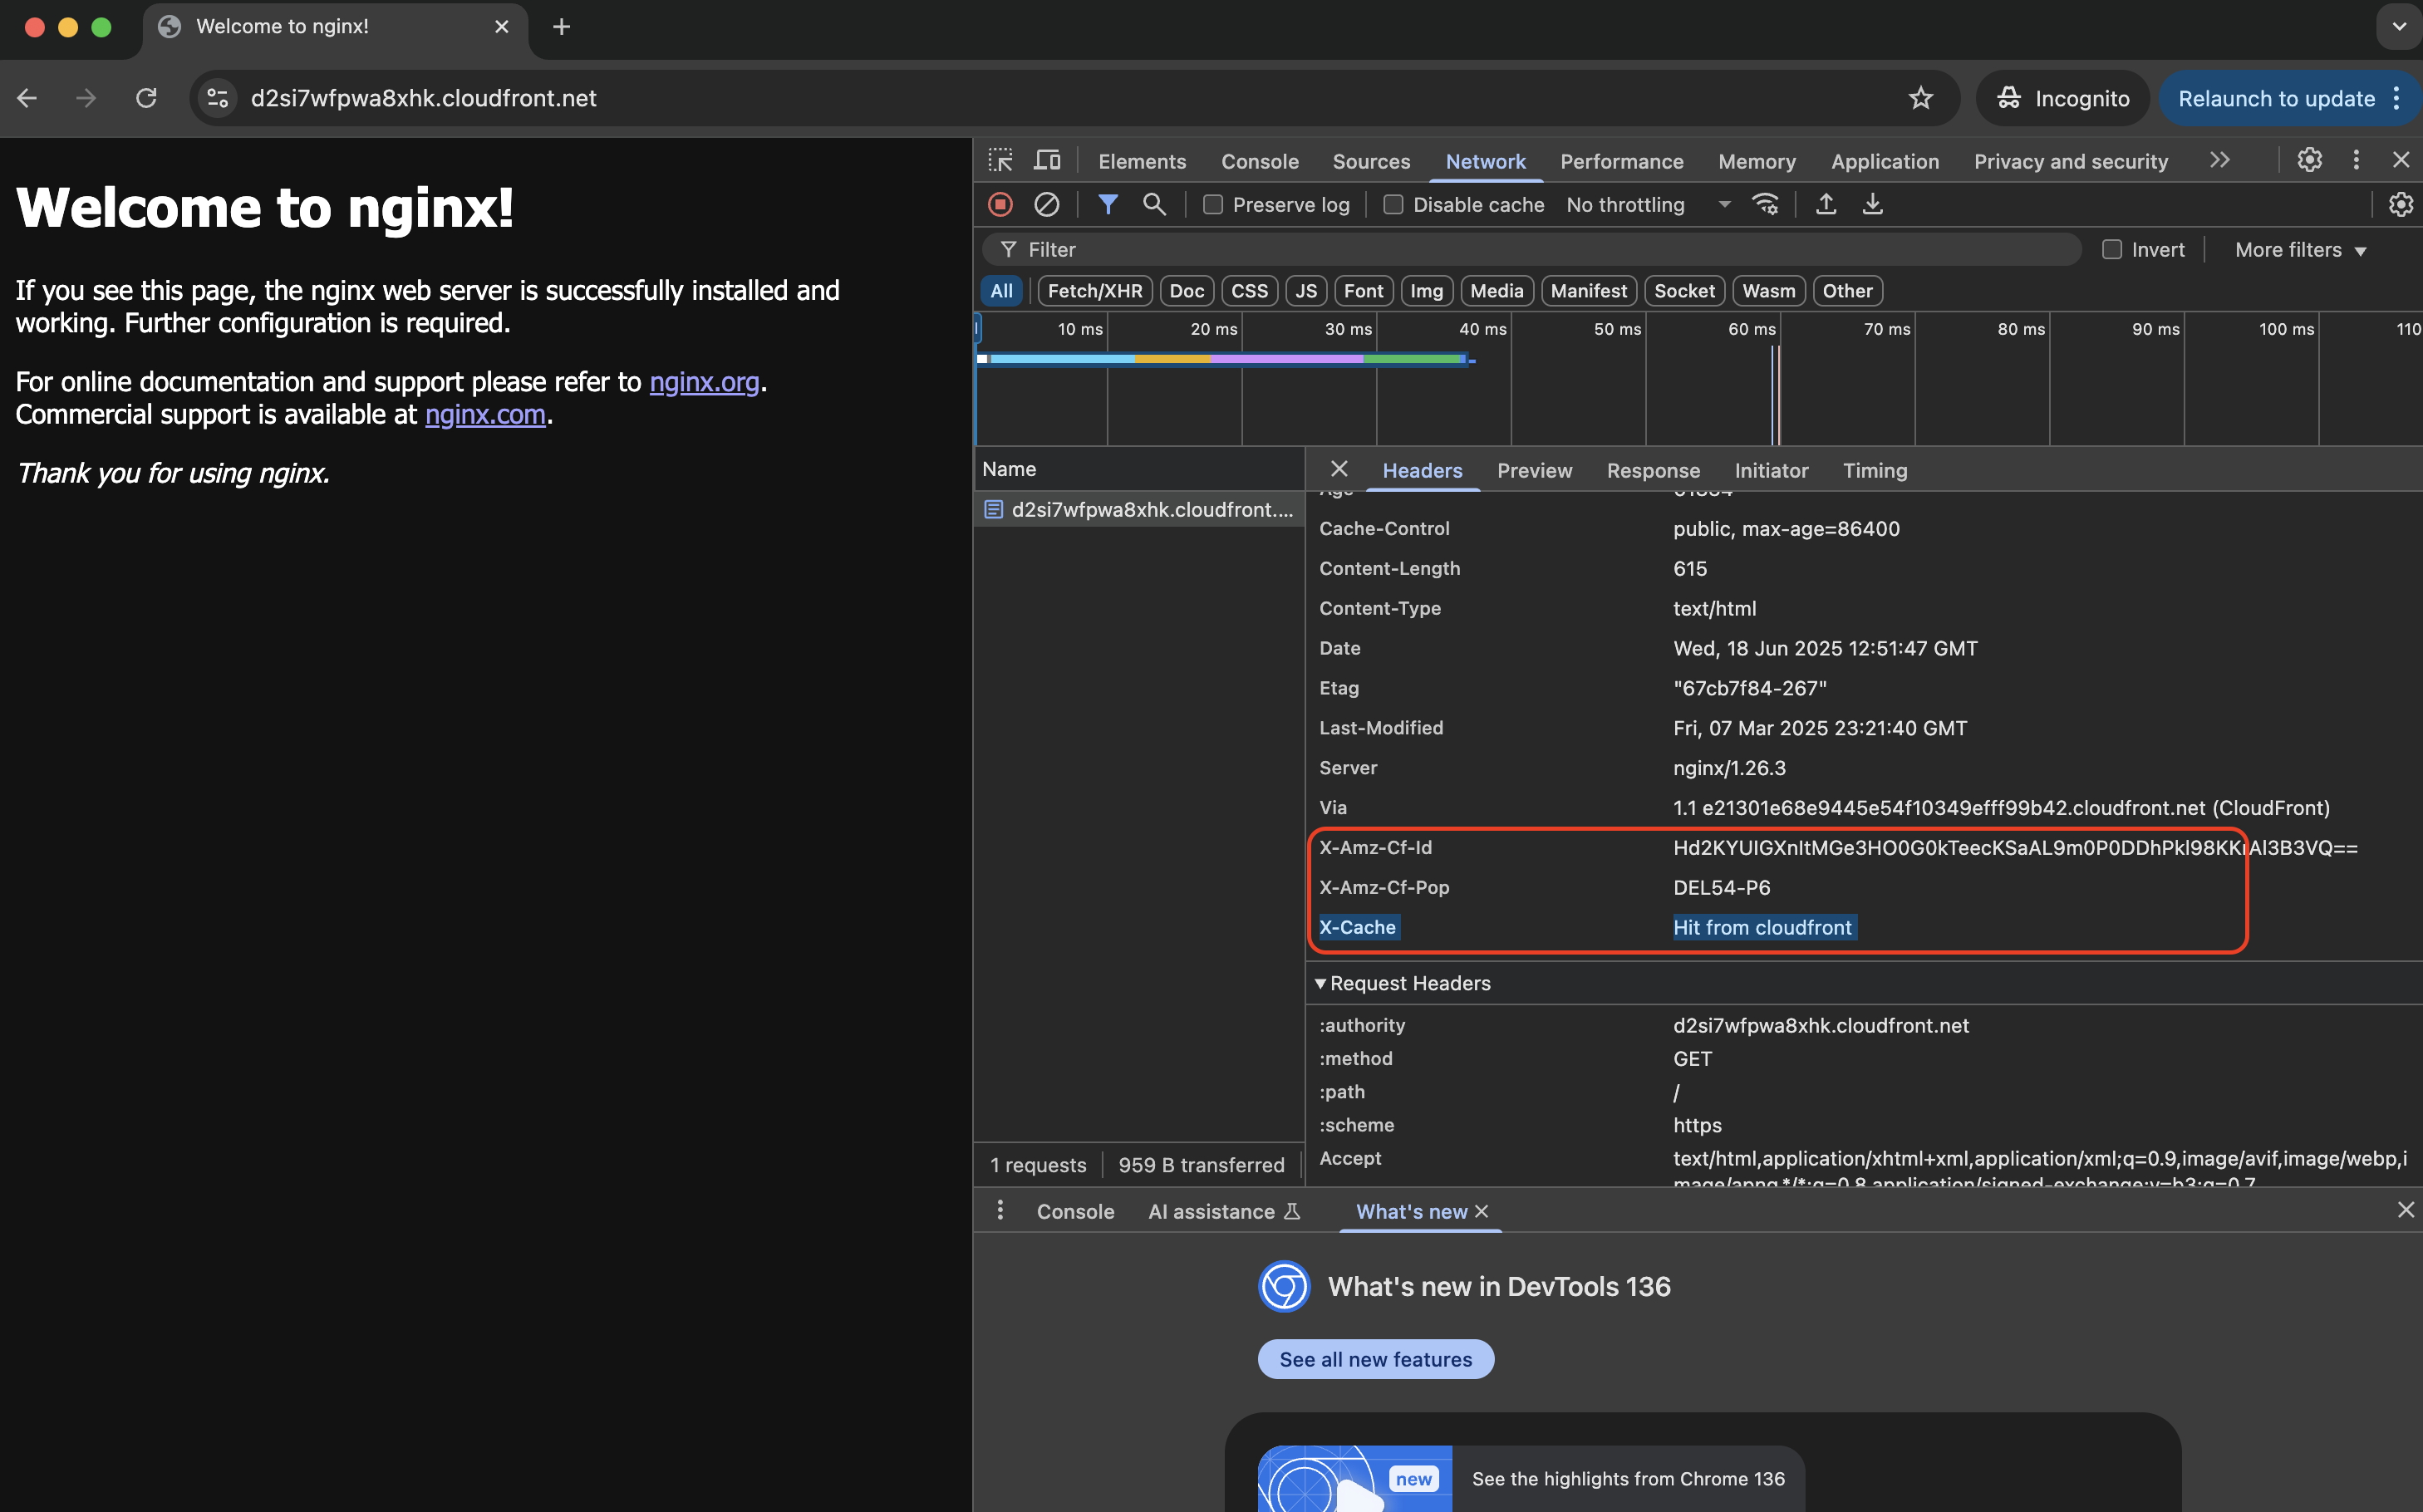
you'll see the following in the response headers:
Hit from CloudFront
This indicates that the content is being served from the edge location, not the origin server.
Adding a Alternate Domain Name
If you want to use your own domain instead of the CloudFront-provided DNS, you need to add Alternate Domain Names (CNAMEs) in the distribution settings.This requires a valid TLS certificate, which must be issued through AWS — either via ACM or IAM.
You can refer to the official documentation:
CloudFront Alternate Domain Names (CNAMEs)
I have created a fresh certificate in ACM.
Note: You must have DNS access to your domain to complete this process.
- Search for Certificate Manager in the AWS Console and click on Request a certificate.
- Choose Request a public certificate under Certificate Type, then click Next.
- In Fully qualified domain name, enter the DNS name you want to use with your CloudFront distribution.
- Leave the remaining settings as default and click Request.
- Under the Domains section, a CNAME entry will be provided. Add this to your DNS records for verification.
- Create a DNS record of type CNAME using the provided name and value.
- Wait a few minutes until the status changes to Success.
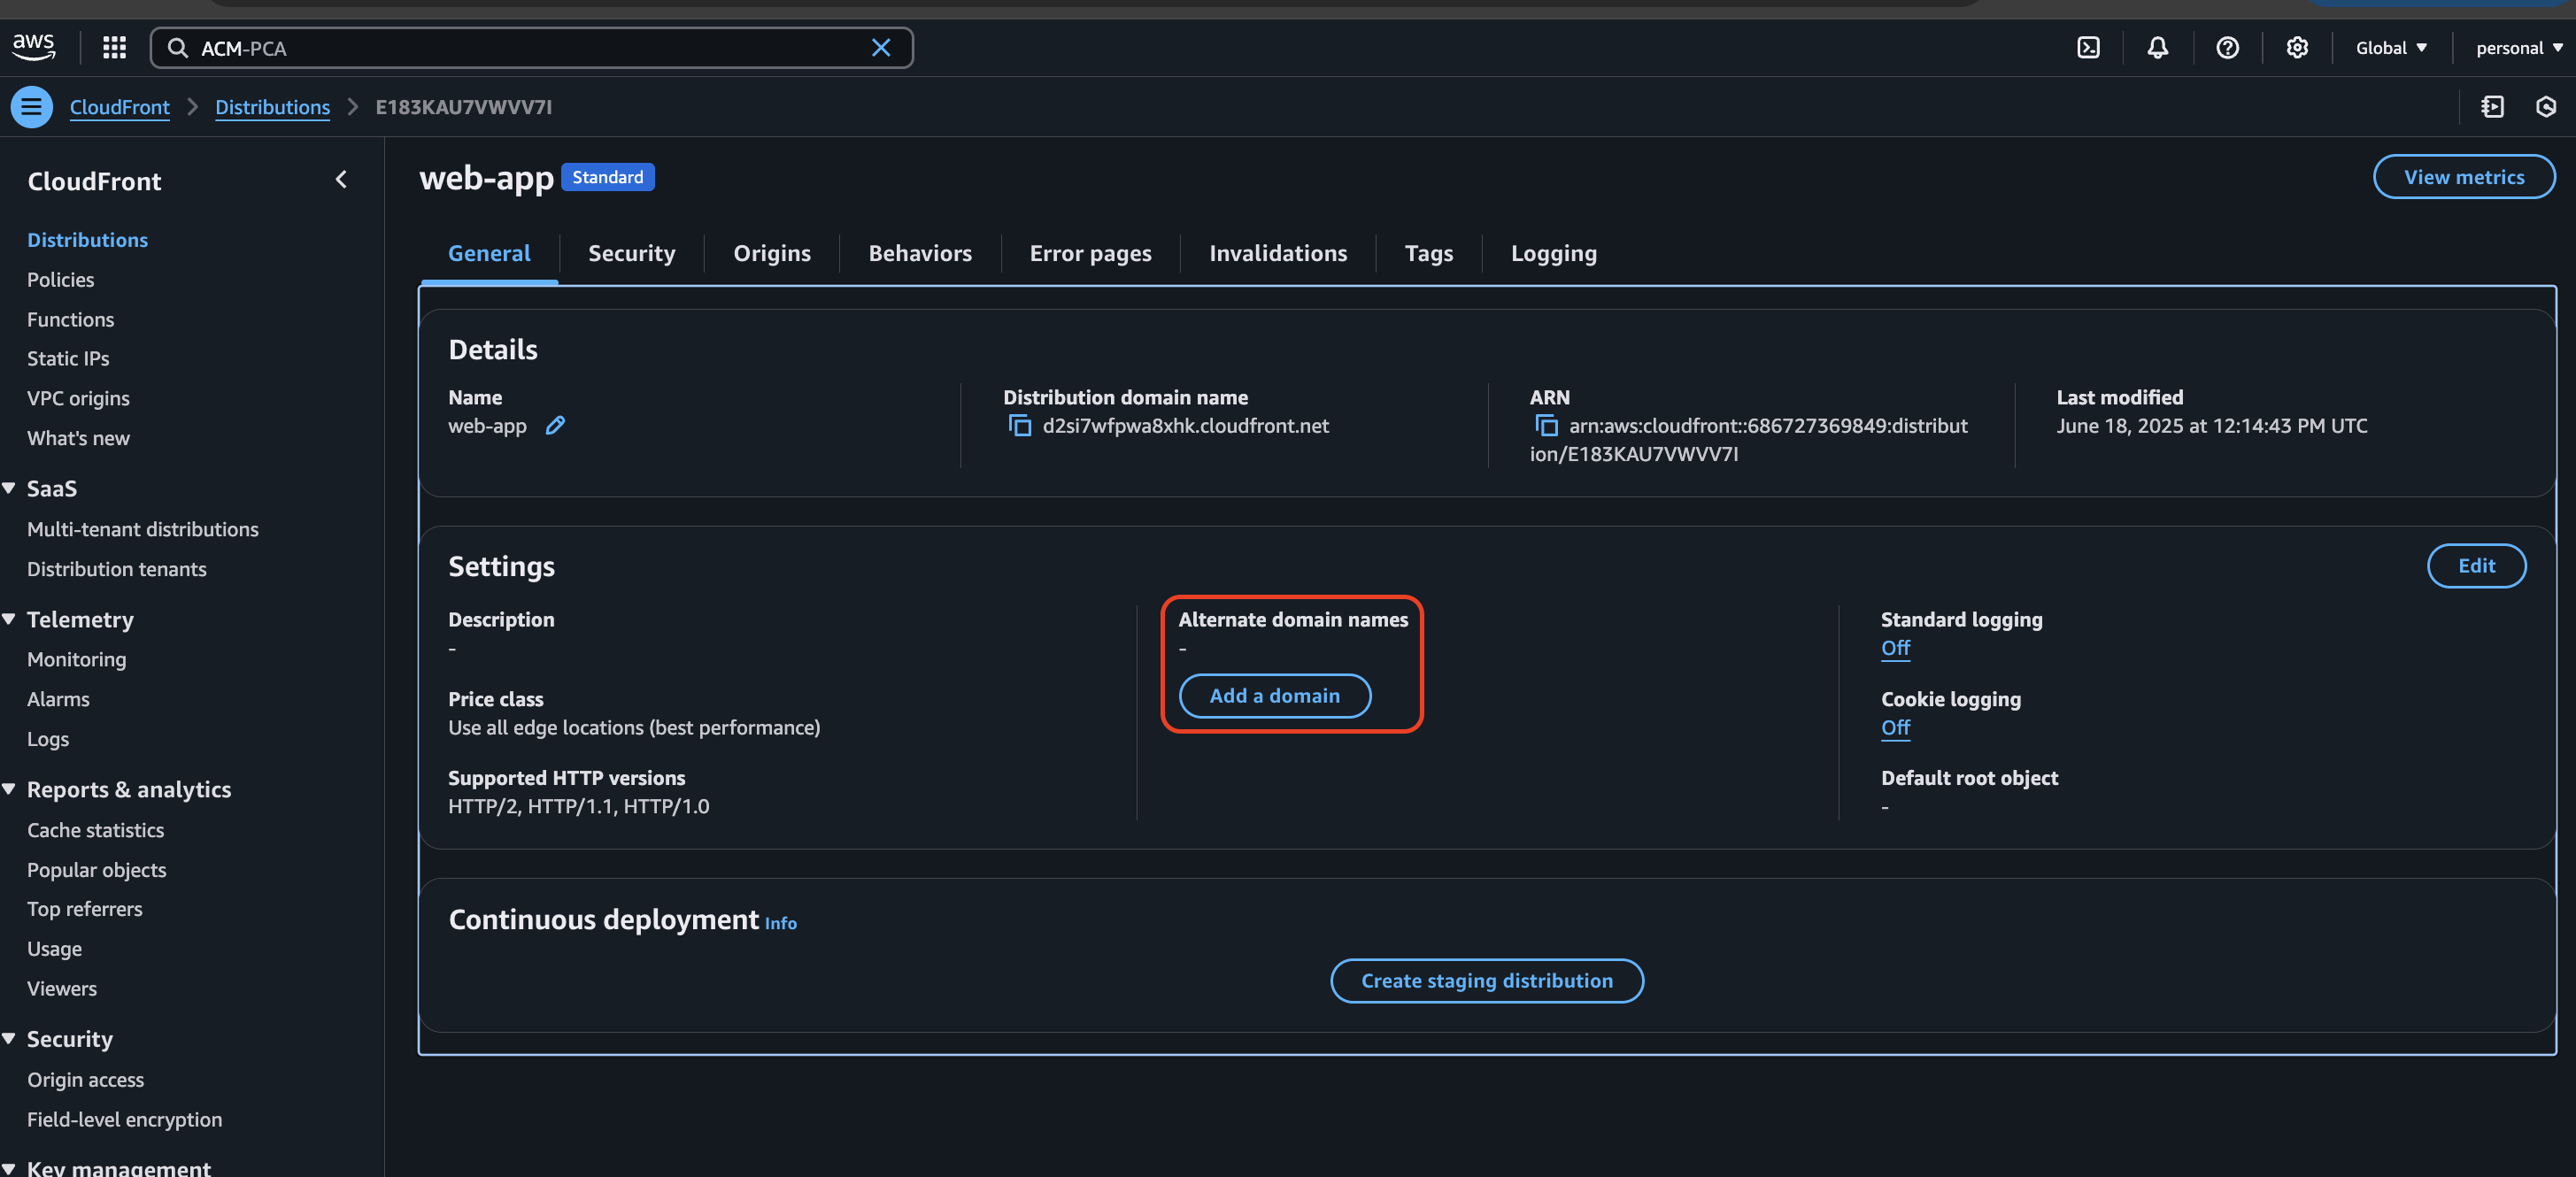
- Type the full domain name you want to use.
- Click on Next and select the certificate you created in Certificate Manager.
- Click Next again and then Add domain.
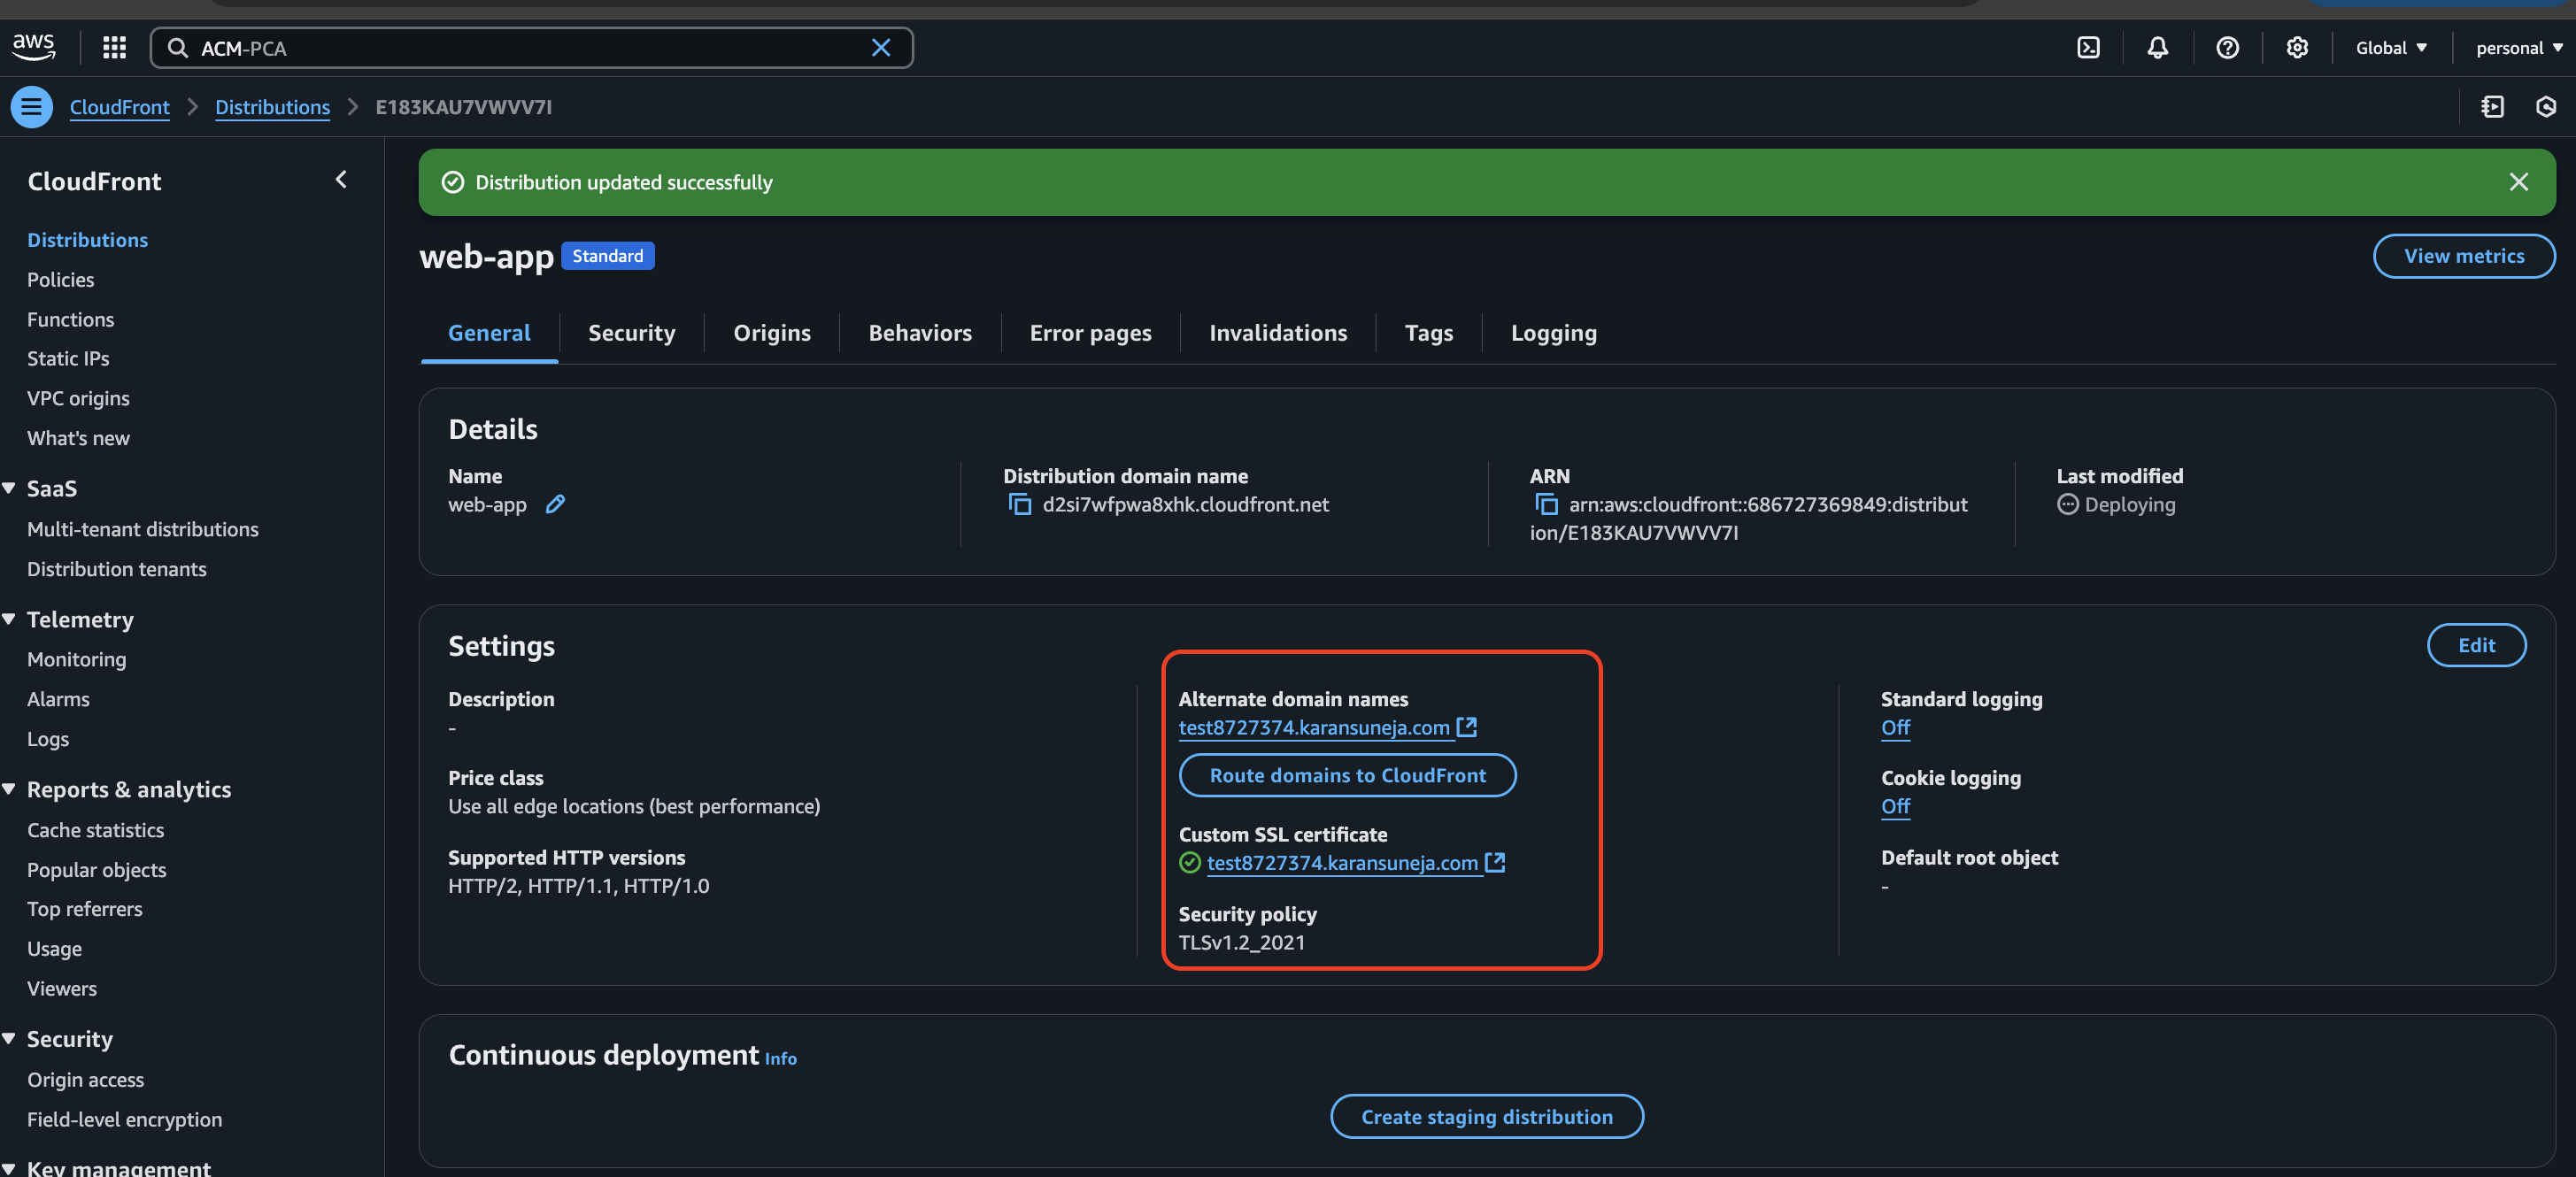
Wait for a few minutes, and you’ll be able to access your server using your custom domain.
Access it multiple times, and you’ll notice the response headers update accordingly.
Conclusion
This is a simple example of how we can use CloudFront to serve our content from AWS edge locations.
For larger files or high-traffic applications, this approach significantly improves performance and reduces latency.
It not only enhances user experience but also helps offload traffic from your origin server.
CloudFront also offers features like caching, security integration with WAF, and support for custom domains — making it a powerful choice for content delivery.
Further Reading / References
- Amazon Cloudfront Documentation
- Accelerate and protect your websites using Amazon CloudFront and AWS WAF
- Add, remove, or replace content that CloudFront distributes
- You can modify the cache behaviour for which you can refer:
Cleanup
- Disable and delete the CloudFront distribution.
- Delete the certificate from Certificate Manager.
- Remove the DNS records you created.
- Delete the server, load balancer, and target group.

Comments